
Carplay installation tutorial on Range Rover Velar

Here we will see in pictures how to install Apple Carplay on a 2018 Land Rover Range Rover Velar with a 10.25-inch screen.
Required hardware: a T20 torx screwdriver
Installation time: about 120 minutes
Inventory: Carplay module and wiring.
So we count the module, a wifi antenna, 2 LVDS (video) cables, the power cable, the sound cable, and a USB cable (no need to plug it in if you use the device wireless).
Reminder: Land Rover plastics are very rigid but very strong.
STEP 1: DISASSEMBLE THE CAR RADIO

Start by removing the plastic that goes from the dashboard to the armrest.

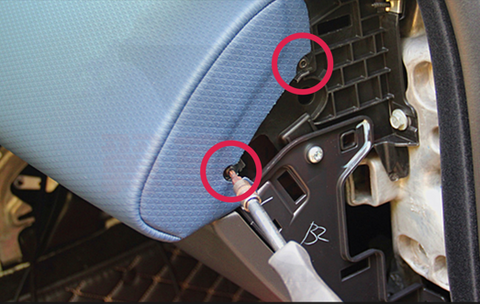
Remove all screws.

A screw in the post.

You can then remove the control panel. Remove it carefully without forgetting to disconnect the various connectors.

Next, remove the cover under the steering wheel counter.

Unscrew the screw that holds the panel holding the touch screen.

2 screws under the screen.

Also remove the passenger side cover.
2 screws.

Remove the screen by pressing on the back.
The screen is finally accessible.
STEP 2: CONNECTIONS

With the screen removed, connect the power supply and the 2 video sockets LVDS_IN and LVDS_OUT.
STEP 3 : ENJOY
You can test by doing a long press (4-5 seconds) on the touch screen with 3 fingers to switch to the Carplay interface.
Link of the module: HERE

Link of the module: HERE
Share:
Homekit integration in Apple Carplay
Carplay installation tutorial on BMW X4 F26
1 comment
Could you please suggest which module will work for CarPlay for rangerover velar 2018 model ( cbu).present it does not support even usb CarPlay option also.